To follow along with this post, you should have basic knowledge of Git and using the Terminal.
By the time you reach the end of an NSS bootcamp, you should be very comfortable with Git. But lurking behind the scenes in your terminal is a power tool where you can automate your commands to improve your workflow!
But before we can shellabrate, let’s start with some basic vocabulary to a few terms you may have heard before, but not understood completely.
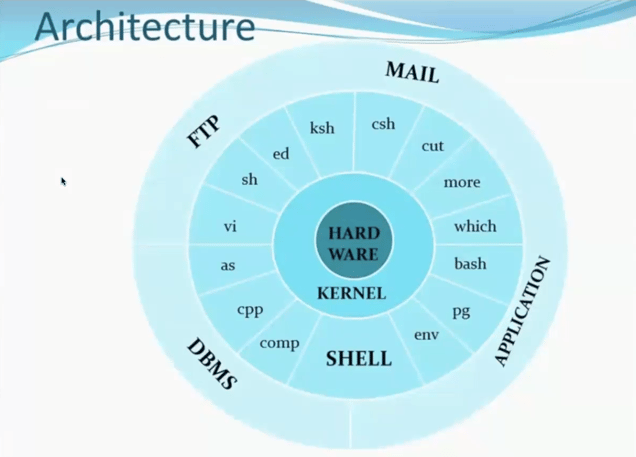
Let’s start with the kernel. Think of the kernel as your basic operating system, like Linux, Unix, and Windows. It’s the interface between your computer’s physical hardware and the processes running on it. In the fifties and sixties, governments and universities would buy massive mainframe computers and people would have to sign up to use it one person at a time. As demand to use these powerful computers grew, it became inefficient to use them one at a time. So some very creative folks came up with an idea to give multiple people the ability to use the computer at the same time, with each person having their own individual development environment. And thus, the shell was born.

Now, every time you log into a computer and you're working in the terminal, you have a shell environment that is unique to you and your user account. When another person logs into the exact same computer, they get their own shell environment that they can customize however they want and run commands at the same time you are.
It was a pretty monumental moment in the history of computing to have these shells created so multiple people could work on the computer at the same time and be customized for each person.
To access the shell and interact with it you’ll use something called a terminal, or terminal emulators, as they used to be called. Whether you're on Windows or Linux or Mac, your terminal is just an application that provides you access to your shell environment. As you type commands into the shell environment, it translates into instructions that work their way down to the kernel, your operating system, to actually run those commands on the hardware on your system.
Customizing your shell environment
So now that you understand what the shell is, let’s talk about how you can customize your shell environment.
Shell initialization files
Within your shell environment are initialization scripts, or files. NSS students may recognize this as your .zshrc file or .bashrc file. Everytime you start a new terminal, the initialization scripts create a new shell environment and all the commands that you have in your initialization script, customize your shell.
Learn more about Zsh and install it at https://ohmyz.sh/.
One common way to customize your shell is to create an alias.
Create an Alias
An alias is the shell environment’s version of a shortcut. So let's say you're in a shell and working on a project where you are switching between a lot of branches to review pull requests. Of course, git checkout is not that complex, but if you’re doing it over and over, it gets really tedious, not to mention the occasional typo. So let’s create a shortcut for git checkout.
In your terminal type alias gc=”get checkout” and press return. Your shortcut of gc is immediately ready for you to use.
Let’s create another alias, this time to create new branches (git checkout -b) so you can efficiently set up a new project with five different branches.
In your terminal, type alias gcn=”git checkout -b” and press return.
With your new aliases set up, give them a try.
gcn new-branch (or whatever you want to call your new branch)
You’ll still need to name your new branch, but you’ve reduced the amount of characters you have to type significantly.
So now that you’re getting the hang of creating aliases, there is one problem – they’re temporary!
You can test it for yourself by opening a new terminal. In the new terminal, your initializations scripts will run and your alias of gc or gcn will no longer work. Creating an alias in your shell is only temporary. If you want an alias to be permanently available to you, you have to make the change in your initialization script.
Create a Permanent Alias
You can add the same aliases we created above to your initialization script and they will be available globally in your terminal. Once you’ve changed your initialization script you’ll need to source it. (Think of sourcing like reloading or refreshing a file.) source ~/.zshrc will rerun your initialization script and the aliases you created will be ready to use.
Not sure how to access your initialization script? If you use Visual Studio Code you can use the command code ~/.zshrc.
Give it a try. Code along with me.
Create a Function to Run Multiple Commands
Now that you’re comfortable with aliases, let’s take it up a notch and create a function shell initialization file that will run multiple commands using positional arguments.
Our goal will be to run the function qc “made a change” and have it run git add --all and git commit ‘m. qc is the function we want to run and the string “made a change” is the first positional argument.
Let’s create the function. We’ll call it qc for “quick commit.” This function looks like functions that you write in JavaScript, except you don’t have to put the function keyword in front of it.
qc () {
}
Now let’s add in our commands.
qc () {
git add --all
git commit -m “”
}
Now we need to access the first positional argument. We’ll do that with $1. This will input the first string you enter into the function.
qc () {
git add --all
git commit -m “$1”
}
Let’s test our function. Save the initialization file and reload it in your terminal.
Make a small change to your project and run qc “made a change” (or whatever commit message you want to use). Boom! With that short command of qc, you’ve added and committed your change!
Let’s add one more command to this function to push our changes.
qc () {
git add --all
git commit -m “$1”
git push origin “$2”
}
Notice the 2nd positional argument? That’s where we’ll put our branch name.
Save your changes, reload your initialization script, and let’s test it again.
Make a small change to your project and run qc “made a change” branch-name. We’ve now combined three different commands into one using positional arguments.

That is one of the most powerful features of bash and one of the benefits of being good at the terminal – these commands can really accelerate your workflow. Anything you need to do in the terminal, you can automate multiple tasks to be running a sequence any way you want.
Learn more about bash in this article from howtogeek.com.
Want another example? Code along with me as I create another function.
Bash Script
Ready to harness the ultimate power of a shell environment? A Bash script can run a complex process, like:
- Initialize a new repository that you’ve created on GitHub
- Pull a git ignore file from the internet, if you’re starting a Django or C# project, for example
- Automatically pull that git ignore file from the internet
- Set up your directory
- Verify that everything was done correctly
Follow along with me in the video below.
So what alias have you tried? How much time have you saved with aliases and functions this week? Share in the comments!